GCDW运行在k8s上,本文在已经部署好docker运行环境基础上,介绍kubernets v1.26.0 的搭建过程。
目录导航
上一步
安装程序
配置数据源。来自于 https://developer.aliyun.com/mirror/kubernetes/
cat <<EOF > /etc/yum.repos.d/kubernetes.repo
[kubernetes]
name=Kubernetes
baseurl=http://mirrors.aliyun.com/kubernetes/yum/repos/kubernetes-el7-x86_64
enabled=1
gpgcheck=0
repo_gpgcheck=0
gpgkey=http://mirrors.aliyun.com/kubernetes/yum/doc/yum-key.gpg
        http://mirrors.aliyun.com/kubernetes/yum/doc/rpm-package-key.gpg
EOF
yum clean all && yum makecache
yum install -y kubelet kubeadm kubectl --disableexcludes=kubernetes如果想安装某个版本,可以用
# 查看有哪些版本
yum list  --showduplicates | grep kube

# 安装指定的版本
yum install kubelet-1.26.0 kubeadm-1.26.0 kubectl-1.26.0 --disableexcludes=kubernetes
安装成功能看到版本。 注意版本号和如下输出不一定相同。
[root@k8s-1 ~]# kubeadm version
kubeadm version: &version.Info{Major:"1", Minor:"25", GitVersion:"v1.25.4", GitCommit:"872a965c6c6526caa949f0c6ac028ef7aff3fb78", GitTreeState:"clean", BuildDate:"2022-11-09T13:35:06Z", GoVersion:"go1.19.3", Compiler:"gc", Platform:"linux/amd64"}
[root@k8s-1 ~]#
开机自启动
systemctl enable --now kubelet
systemctl restart kubelet
注意,swap一定要永久关闭,否则kubelet启动会,后报错。 关闭后,服务启动成功。
[root@vm246 ~]# systemctl status kubelet
● kubelet.service - kubelet: The Kubernetes Node Agent
   Loaded: loaded (/usr/lib/systemd/system/kubelet.service; enabled; vendor preset: disabled)
  Drop-In: /usr/lib/systemd/system/kubelet.service.d
           └─10-kubeadm.conf
   Active: activating (auto-restart) (Result: exit-code) since Thu 2023-06-15 21:19:15 PDT; 8s ago
     Docs: https://kubernetes.io/docs/
  Process: 4398 ExecStart=/usr/bin/kubelet $KUBELET_KUBECONFIG_ARGS $KUBELET_CONFIG_ARGS $KUBELET_KUBEADM_ARGS $KUBELET_EXTRA_ARGS (code=exited, status=1/FAILURE)
 Main PID: 4398 (code=exited, status=1/FAILURE)

Jun 15 21:19:15 vm246 systemd[1]: Unit kubelet.service entered failed state.
Jun 15 21:19:15 vm246 systemd[1]: kubelet.service failed.
[root@vm246 ~]# ^C
[root@vm246 ~]# ^C
[root@vm246 ~]# ^C
[root@vm246 ~]# systemctl show --property=Environment kubelet |cat
Environment=KUBELET_KUBECONFIG_ARGS=--bootstrap-kubeconfig=/etc/kubernetes/bootstrap-kubelet.conf --kubeconfig=/etc/kubernetes/kubelet.conf KUBELET_CONFIG_ARGS=--config=/var/lib/kubelet/config.yaml
[root@vm246 ~]# ^C
[root@vm246 ~]# /usr/bin/kubelet $KUBELET_KUBECONFIG_ARGS $KUBELET_CONFIG_ARGS $KUBELET_KUBEADM_ARGS $KUBELET_EXTRA_ARGS
I0615 21:21:07.315616    4578 server.go:415] "Kubelet version" kubeletVersion="v1.27.3"
I0615 21:21:07.315785    4578 server.go:417] "Golang settings" GOGC="" GOMAXPROCS="" GOTRACEBACK=""
I0615 21:21:07.316016    4578 server.go:578] "Standalone mode, no API client"
I0615 21:21:07.317975    4578 container_manager_linux.go:822] "CPUAccounting not enabled for process" pid=4578
I0615 21:21:07.318003    4578 container_manager_linux.go:825] "MemoryAccounting not enabled for process" pid=4578
I0615 21:21:07.331296    4578 server.go:466] "No api server defined - no events will be sent to API server"
I0615 21:21:07.331326    4578 server.go:662] "--cgroups-per-qos enabled, but --cgroup-root was not specified.  defaulting to /"
E0615 21:21:07.331824    4578 run.go:74] "command failed" err="failed to run Kubelet: running with swap on is not supported, please disable swap! or set --fail-swap-on flag to false. /proc/swaps contained: [Filename\t\t\t\tType\t\tSize\tUsed\tPriority /dev/sda2                               partition\t8258556\t0\t-2]"
[root@vm246 ~]# swapoff -a
生成初始化配置文件
kubeadm config print init-defaults > kubeadm.yaml编辑配置文件
advertiseAddress
将IP写对
imageRepository
镜像服务器地址调整, 我这里用的是registry.aliyuncs.com/google_containers。
注意,这里是指向kubernets的镜像, 我没有下载到我自己的harbor镜像上,所以还是用的aliyun的。
name
节点名字调整, 用主机名。
taints
删掉后面的null,在下一行按如下格式。 【目前还不知道干啥用的】。
注意里面的横线位置对齐,否则文档格式会校验错误。
  taints:
  - effect: NoSchedule
    key: node-role.kubernetes.io/master
完整的配置文件
[root@k8s-81 ~]# cat kubeadm.yaml
apiVersion: kubeadm.k8s.io/v1beta3
bootstrapTokens:
- groups:
  - system:bootstrappers:kubeadm:default-node-token
  token: abcdef.0123456789abcdef
  ttl: 24h0m0s
  usages:
  - signing
  - authentication
kind: InitConfiguration
localAPIEndpoint:
  advertiseAddress: 10.0.2.81
  bindPort: 6443
nodeRegistration:
  criSocket: unix:///var/run/containerd/containerd.sock
  imagePullPolicy: IfNotPresent
  name: k8s-81
  taints:
  - effect: NoSchedule
    key: node-role.kubernetes.io/master
---
apiServer:
  timeoutForControlPlane: 4m0s
apiVersion: kubeadm.k8s.io/v1beta3
certificatesDir: /etc/kubernetes/pki
clusterName: kubernetes
controllerManager: {}
dns: {}
etcd:
  local:
    dataDir: /var/lib/etcd
imageRepository: registry.aliyuncs.com/google_containers
kind: ClusterConfiguration
kubernetesVersion: 1.26.0
networking:
  dnsDomain: cluster.local
  serviceSubnet: 10.96.0.0/12
scheduler: {}
[root@k8s-81 ~]#
建议提前下载镜像
本文使用的是aliyun的镜像
[root@k8s-83 docker]# kubeadm config images pull --image-repository=registry.aliyuncs.com/google_containers
[config/images] Pulled registry.aliyuncs.com/google_containers/kube-apiserver:v1.26.1
[config/images] Pulled registry.aliyuncs.com/google_containers/kube-controller-manager:v1.26.1
[config/images] Pulled registry.aliyuncs.com/google_containers/kube-scheduler:v1.26.1
[config/images] Pulled registry.aliyuncs.com/google_containers/kube-proxy:v1.26.1
[config/images] Pulled registry.aliyuncs.com/google_containers/pause:3.9
[config/images] Pulled registry.aliyuncs.com/google_containers/etcd:3.5.6-0
[config/images] Pulled registry.aliyuncs.com/google_containers/coredns:v1.9.3
[root@k8s-83 docker]#
初始化
这里用init,有master和控制节点在一起。 如果是单纯扩容worker计算节点,用join命令而不是init。
[root@vm248 ~]# kubeadm init --config=kubeadm.yaml
[init] Using Kubernetes version: v1.26.0
[preflight] Running pre-flight checks
[preflight] Pulling images required for setting up a Kubernetes cluster
[preflight] This might take a minute or two, depending on the speed of your internet connection
[preflight] You can also perform this action in beforehand using 'kubeadm config images pull'
[certs] Using certificateDir folder "/etc/kubernetes/pki"
[certs] Generating "ca" certificate and key
[certs] Generating "apiserver" certificate and key
[certs] apiserver serving cert is signed for DNS names [kubernetes kubernetes.default kubernetes.default.svc kubernetes.default.svc.cluster.local vm248] and IPs [10.96.0.1 172.16.3.248]
[certs] Generating "apiserver-kubelet-client" certificate and key
[certs] Generating "front-proxy-ca" certificate and key
[certs] Generating "front-proxy-client" certificate and key
[certs] Generating "etcd/ca" certificate and key
[certs] Generating "etcd/server" certificate and key
[certs] etcd/server serving cert is signed for DNS names [localhost vm248] and IPs [172.16.3.248 127.0.0.1 ::1]
[certs] Generating "etcd/peer" certificate and key
[certs] etcd/peer serving cert is signed for DNS names [localhost vm248] and IPs [172.16.3.248 127.0.0.1 ::1]
[certs] Generating "etcd/healthcheck-client" certificate and key
[certs] Generating "apiserver-etcd-client" certificate and key
[certs] Generating "sa" key and public key
[kubeconfig] Using kubeconfig folder "/etc/kubernetes"
[kubeconfig] Writing "admin.conf" kubeconfig file
[kubeconfig] Writing "kubelet.conf" kubeconfig file
[kubeconfig] Writing "controller-manager.conf" kubeconfig file
[kubeconfig] Writing "scheduler.conf" kubeconfig file
[kubelet-start] Writing kubelet environment file with flags to file "/var/lib/kubelet/kubeadm-flags.env"
[kubelet-start] Writing kubelet configuration to file "/var/lib/kubelet/config.yaml"
[kubelet-start] Starting the kubelet
[control-plane] Using manifest folder "/etc/kubernetes/manifests"
[control-plane] Creating static Pod manifest for "kube-apiserver"
[control-plane] Creating static Pod manifest for "kube-controller-manager"
[control-plane] Creating static Pod manifest for "kube-scheduler"
[etcd] Creating static Pod manifest for local etcd in "/etc/kubernetes/manifests"
[wait-control-plane] Waiting for the kubelet to boot up the control plane as static Pods from directory "/etc/kubernetes/manifests". This can take up to 4m0s
[apiclient] All control plane components are healthy after 36.511564 seconds
[upload-config] Storing the configuration used in ConfigMap "kubeadm-config" in the "kube-system" Namespace
[kubelet] Creating a ConfigMap "kubelet-config" in namespace kube-system with the configuration for the kubelets in the cluster
[upload-certs] Skipping phase. Please see --upload-certs
[mark-control-plane] Marking the node vm248 as control-plane by adding the labels: [node-role.kubernetes.io/control-plane node.kubernetes.io/exclude-from-external-load-balancers]
[mark-control-plane] Marking the node vm248 as control-plane by adding the taints [node-role.kubernetes.io/control-plane:NoSchedule]
[bootstrap-token] Using token: abcdef.0123456789abcdef
[bootstrap-token] Configuring bootstrap tokens, cluster-info ConfigMap, RBAC Roles
[bootstrap-token] Configured RBAC rules to allow Node Bootstrap tokens to get nodes
[bootstrap-token] Configured RBAC rules to allow Node Bootstrap tokens to post CSRs in order for nodes to get long term certificate credentials
[bootstrap-token] Configured RBAC rules to allow the csrapprover controller automatically approve CSRs from a Node Bootstrap Token
[bootstrap-token] Configured RBAC rules to allow certificate rotation for all node client certificates in the cluster
[bootstrap-token] Creating the "cluster-info" ConfigMap in the "kube-public" namespace
[kubelet-finalize] Updating "/etc/kubernetes/kubelet.conf" to point to a rotatable kubelet client certificate and key
[addons] Applied essential addon: CoreDNS
[addons] Applied essential addon: kube-proxy

Your Kubernetes control-plane has initialized successfully!

To start using your cluster, you need to run the following as a regular user:

  mkdir -p $HOME/.kube
  sudo cp -i /etc/kubernetes/admin.conf $HOME/.kube/config
  sudo chown $(id -u):$(id -g) $HOME/.kube/config

Alternatively, if you are the root user, you can run:

  export KUBECONFIG=/etc/kubernetes/admin.conf

You should now deploy a pod network to the cluster.
Run "kubectl apply -f [podnetwork].yaml" with one of the options listed at:
  https://kubernetes.io/docs/concepts/cluster-administration/addons/

Then you can join any number of worker nodes by running the following on each as root:

kubeadm join 172.16.3.248:6443 --token abcdef.0123456789abcdef \
        --discovery-token-ca-cert-hash sha256:60c04264e5c7dc356a1ed362b13b37da2d2bec7ff108c9fbb846e4594f927f9c
[root@vm248 ~]#
token的时效性和重新生成
查看
在控制平面节点上运行以下命令来获取令牌
[root@k8s-81 ~]# kubeadm token list
TOKEN                     TTL         EXPIRES                USAGES                   DESCRIPTION                                                EXTRA GROUPS
abcdef.0123456789abcdef   21h         2023-02-24T03:18:38Z   authentication,signing   <none>                                                     system:bootstrappers:kubeadm:default-node-token
[root@k8s-81 ~]#
注意其中最后的token是有时效性的,如果过期了,需要重新生成
[root@k8s-81 opt]# kubeadm token generate
wqcanr.t9lvabt314fso99o
生成join的命令
[root@k8s-81 opt]#  kubeadm token create wqcanr.t9lvabt314fso99o  --print-join-command --ttl=0
kubeadm join 10.0.2.81:6443 --token wqcanr.t9lvabt314fso99o --discovery-token-ca-cert-hash sha256:ba1128b14a989b26900a12f080cbfcfa8f63305bfdcbcbd15c548af5eda544df
k8s环境变量
root使用,需要执行如下环境变量
export KUBECONFIG=/etc/kubernetes/admin.conf建议在用户主目录下,复制一份
mkdir ~/.kube
cp /etc/kubernetes/admin.conf ~/.kube/config
否则会出现连接不上的报错
[root@k8s-82 ~]# kubectl get all -n gcdw
E0605 08:18:21.052366    6942 memcache.go:238] couldn't get current server API group list: Get "http://localhost:8080/api?timeout=32s": dial                          tcp [::1]:8080: connect: connection refused
E0605 08:18:21.053302    6942 memcache.go:238] couldn't get current server API group list: Get "http://localhost:8080/api?timeout=32s": dial                          tcp [::1]:8080: connect: connection refused
E0605 08:18:21.056747    6942 memcache.go:238] couldn't get current server API group list: Get "http://localhost:8080/api?timeout=32s": dial                          tcp [::1]:8080: connect: connection refused
E0605 08:18:21.057738    6942 memcache.go:238] couldn't get current server API group list: Get "http://localhost:8080/api?timeout=32s": dial                          tcp [::1]:8080: connect: connection refused
E0605 08:18:21.058807    6942 memcache.go:238] couldn't get current server API group list: Get "http://localhost:8080/api?timeout=32s": dial                          tcp [::1]:8080: connect: connection refused
The connection to the server localhost:8080 was refused - did you specify the right host or port?
[root@k8s-82 ~]#
查看k8s环境
[root@k8s-81 ~]# kubectl get all
NAME                 TYPE        CLUSTER-IP   EXTERNAL-IP   PORT(S)   AGE
service/kubernetes   ClusterIP   10.96.0.1    <none>        443/TCP   160m
[root@k8s-81 ~]#

[root@k8s-81 ~]# kubectl get nodes
NAME     STATUS     ROLES           AGE    VERSION
k8s-81   NotReady   control-plane   170m   v1.26.0
[root@k8s-81 ~]#

查看所有的pods
[root@k8s-81 ~]# kubectl get pods --all-namespaces
NAMESPACE     NAME                             READY   STATUS    RESTARTS   AGE
kube-system   coredns-5bbd96d687-2w58n         0/1     Pending   0          163m
kube-system   coredns-5bbd96d687-7vksl         0/1     Pending   0          163m
kube-system   etcd-k8s-81                      1/1     Running   1          163m
kube-system   kube-apiserver-k8s-81            1/1     Running   1          163m
kube-system   kube-controller-manager-k8s-81   1/1     Running   1          163m
kube-system   kube-proxy-wrfgf                 1/1     Running   0          163m
kube-system   kube-scheduler-k8s-81            1/1     Running   1          163m
[root@k8s-81 ~]#
将本地节点master加入到worker节点里
默认master是不参与计算worker服务的。
[root@k8s-81 ~]# kubectl taint nodes --all node-role.kubernetes.io/master-安装cni-plugin-flannel
如果containerd报错
缺少flannel文件
journalctl -u containerd -f -n 200
flannel\" failed (delete): failed to find plugin \"flannel\" in path [/opt/cni/bin]下载地址 :https://github.com/flannel-io/cni-plugin
选择amd64的下载,比如我的是 cni-plugin-flannel-linux-amd64-v1.1.2 .tgz
解压后,将flannel-amd64文件,复制到 /opt/cni/bin
[root@vm246 ~]# ll /opt/cni/bin
total 52116
-rwxr-xr-x. 1 root root 2782728 Jan 18 13:09 bandwidth
-rwxr-xr-x. 1 root root 3104192 Jan 18 13:09 bridge
-rwxr-xr-x. 1 root root 7607056 Jan 18 13:09 dhcp
-rwxr-xr-x. 1 root root 2863024 Jan 18 13:09 dummy
-rwxr-xr-x. 1 root root 3165352 Jan 18 13:09 firewall
-rwxr-xr-x. 1 root root 2342446 Jun 18 17:39 flannel
-rwxr-xr-x. 1 root root 2775224 Jan 18 13:09 host-device
-rwxr-xr-x. 1 root root 2332792 Jan 18 13:09 host-local
-rwxr-xr-x. 1 root root 2871792 Jan 18 13:09 ipvlan
-rwxr-xr-x. 1 root root 2396976 Jan 18 13:09 loopback
-rwxr-xr-x. 1 root root 2893624 Jan 18 13:09 macvlan
-rwxr-xr-x. 1 root root 2689440 Jan 18 13:09 portmap
-rwxr-xr-x. 1 root root 3000032 Jan 18 13:09 ptp
-rwxr-xr-x. 1 root root 2542400 Jan 18 13:09 sbr
-rwxr-xr-x. 1 root root 2074072 Jan 18 13:09 static
-rwxr-xr-x. 1 root root 2456920 Jan 18 13:09 tuning
-rwxr-xr-x. 1 root root 2867512 Jan 18 13:09 vlan
-rwxr-xr-x. 1 root root 2566424 Jan 18 13:09 vrf
[root@vm246 ~]#
报错:缺少sbunet.env文件
failed (add): loadFlannelSubnetEnv failed: open /run/flannel/subnet.env: no such file or directory"
在/run/flannel/创建subnet.env。 也有消息说,后面安装kube-flannel会自动生成这个文件。
如果不存在,则创建一个。
mkdir /run/flannel/
[root@vm246 ~]# ll /run/flannel/
total 4
-rw-r--r--. 1 root root 96 Jun 18 17:40 subnet.env
[root@vm246 ~]# cat /run/flannel/subnet.env
FLANNEL_NETWORK=10.244.0.0/16
FLANNEL_SUBNET=10.244.0.1/24
FLANNEL_MTU=1450
FLANNEL_IPMASQ=true
[root@vm246 ~]#
安装kube-flannel
这一步和上一步,我还没实验出到底先安装哪个。 不过反正都得装,也无所谓了。
下载地址如果不能拿到最新的,请自行找其它能用的。
来源:https://github.com/flannel-io/flannel
配置文件里,一些镜像来源,可能需要修改。
wget  https://github.com/flannel-io/flannel/releases/latest/download/kube-flannel.yml

[root@k8s-81 ~]# kubectl apply -f kube-flannel.yml
namespace/kube-flannel created
serviceaccount/flannel created
clusterrole.rbac.authorization.k8s.io/flannel created
clusterrolebinding.rbac.authorization.k8s.io/flannel created
configmap/kube-flannel-cfg created
daemonset.apps/kube-flannel-ds created
[root@k8s-81 ~]#
因为默认是从docker.io下载,如果连不上,会出现containerd服务错误。包括flannel和flannel-cni-plugin。
https://github.com/flannel-io/cni-plugin/releases/tag/v1.1.2
Jun 15 23:01:42 vm246 containerd[7939]: time="2023-06-15T23:01:42.585211406-07:00" level=error msg="PullImage \"docker.io/flannel/flannel-cni-plugin:v1.1.2\" failed" error="failed to pull and unpack image \"docker.io/flannel/flannel-cni-plugin:v1.1.2\": failed to copy: httpReadSeeker: failed open: failed to do request: Get \"https://production.cloudflare.docker.com/registry-v2/docker/registry/v2/blobs/sha256/7a/7a2dcab94698c786e7e41360faf8cd0ea2b29952469be75becc34c61902240e0/data?verify=1686898272-5ueUAr6ZbHVfP%2BO21D01OFYsvMM%3D\": dial tcp 104.18.125.25:443: i/o timeout"
修改kubernets配置
/etc/kubernetes/manifests/kube-controller-manager.yaml增加2个启动参数
- --allocate-node-cidrs=true
- --cluster-cidr=10.244.0.0/16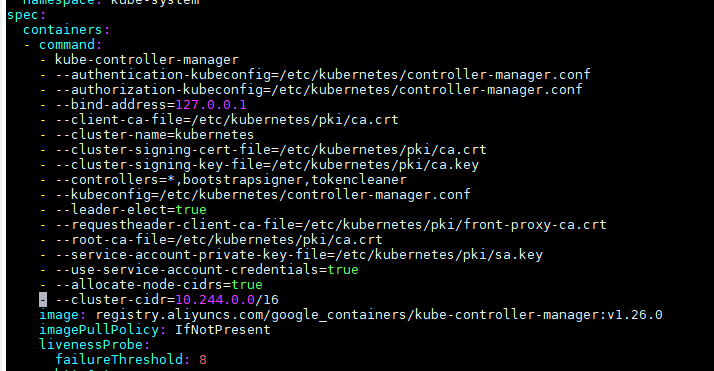
重新部署
kubectl apply -f kube-flannel.yml重启服务
systemctl restart kubelet如上步骤【可能】有优化的余地。。。。
扩容集群
将82和83节点加入,形成3节点的kubernets集群。
因为gcdw需要的cpu比较多,需要多配置几个节点,来让集群由足够的资源来启动服务。
我的虚拟机每个配置了4个CPU核,虽然我的机器一共才4个。
扩容节点服务安装
只需要在新节点安装环境以及kubenets程序就行,不要做init等操作。注意kube-flanne是需要的。
生成新的takon和join命令
[root@k8s-81 ~]# kubeadm token generate
xobiaq.nseeu0obv0ngl7fv
[root@k8s-81 ~]#  kubeadm token create xobiaq.nseeu0obv0ngl7fv  --print-join-command --ttl=0
kubeadm join 10.0.2.81:6443 --token xobiaq.nseeu0obv0ngl7fv --discovery-token-ca-cert-hash sha256:ba1128b14a989b26900a12f080cbfcfa8f63305bfdcbcbd15c548af5eda544df
[root@k8s-81 ~]#
在新节点运行join加入集群
[root@k8s-83 kubernetes]# kubeadm join 10.0.2.81:6443 --token xobiaq.nseeu0obv0ngl7fv --discovery-token-ca-cert-hash sha256:ba1128b14a989b26900a12f080cbfcfa8f63305bfdcbcbd15c548af5eda544df
[preflight] Running pre-flight checks
[preflight] Reading configuration from the cluster...
[preflight] FYI: You can look at this config file with 'kubectl -n kube-system get cm kubeadm-config -o yaml'
[kubelet-start] Writing kubelet configuration to file "/var/lib/kubelet/config.yaml"
[kubelet-start] Writing kubelet environment file with flags to file "/var/lib/kubelet/kubeadm-flags.env"
[kubelet-start] Starting the kubelet
[kubelet-start] Waiting for the kubelet to perform the TLS Bootstrap...

This node has joined the cluster:
* Certificate signing request was sent to apiserver and a response was received.
* The Kubelet was informed of the new secure connection details.

Run 'kubectl get nodes' on the control-plane to see this node join the cluster.

[root@k8s-83 kubernetes]#
查看kubectl的所有服务中的节点
[root@k8s-81 chart]# kubectl get nodes
NAME     STATUS   ROLES           AGE   VERSION
k8s-81   Ready    control-plane   73d   v1.26.0
k8s-82   Ready    <none>          72d   v1.26.1
k8s-83   Ready    <none>          67d   v1.26.1
[root@k8s-81 chart]#
缩容
通过如下2步,将节点从集群移除
1,将节点设置为维护模式,运行中的服务迁移,
2、将节点移除
3、可选,将被移除的节点初始化(kubeadm reset)
[root@vm248 ~]# kubectl drain vm247 --delete-local-data --force --ignore-daemonsets
Flag --delete-local-data has been deprecated, This option is deprecated and will be deleted. Use --delete-emptydir-data.
node/vm247 cordoned
Warning: ignoring DaemonSet-managed Pods: kube-flannel/kube-flannel-ds-hpc7c, kube-system/kube-proxy-jtm4m
evicting pod zxq/gcware-0
evicting pod zxq/coordinator-1-0
pod/gcware-0 evicted
pod/coordinator-1-0 evicted
node/vm247 drained
[root@vm248 ~]# kubectl delete node vm247
node "vm247" deleted
[root@vm248 ~]# kubetl get nodes
bash: kubetl: command not found...
[root@vm248 ~]# kubectl get nodes
NAME    STATUS   ROLES           AGE   VERSION
vm248   Ready    control-plane   41h   v1.27.3
[root@vm248 ~]#
其它
一些kube常见调试命令
kubectl get all -o wide 查看pod运行在哪个node上
[root@vm248 ~]# kubectl get all -n zxq -o wide
NAME                  READY   STATUS              RESTARTS   AGE   IP          NODE    NOMINATED NODE   READINESS GATES
pod/coordinator-1-0   1/1     Terminating         0          15m   10.88.0.7   vm247   <none>           <none>
pod/gcware-0          0/1     ContainerCreating   0          9s    <none>      vm248   <none>           <none>

NAME                    TYPE        CLUSTER-IP     EXTERNAL-IP   PORT(S)          AGE   SELECTOR
service/coordinator-1   NodePort    10.105.243.4   <none>        5258:30821/TCP   15m   app=gcdw,index=1,service=coordinator,tenant=zxq
service/gcware          ClusterIP   None           <none>        5919/TCP         15m   app=gcdw,service=gcware,tenant=zxq

NAME                             READY   AGE   CONTAINERS    IMAGES
statefulset.apps/coordinator-1   1/1     15m   coordinator   172.16.3.249:8443/gcdw/gcdw-server:9.8.0.4.1
statefulset.apps/gcware          0/1     15m   gcware        172.16.3.249:8443/gcdw/gcdw-server:9.8.0.4.1
kubectl describe pods 查看pod状态
查看pod的状态,如果get pods显示的状态不是Running, 则可以用这个来你检查。比如下面的gcdw-1-0
[root@vm248 ~]# kubectl get all -n gcdw
NAME                                READY   STATUS    RESTARTS       AGE
pod/gcdw-1-0                        0/1     Pending   0              3d23h
pod/gcdw-ftp-0                      1/1     Running   6 (3d ago)     69d
pod/gcdw-operator-b66b7b698-xhc88   1/1     Running   82 (3d ago)    69d
pod/gcdw-redis-0                    1/1     Running   6 (3d ago)     69d
pod/gcdw-saas-backend-0             1/1     Running   6 (3d ago)     69d
pod/gcdw-saas-frontend-0            1/1     Running   14 (20m ago)   69d
pod/gcware-0                        0/1     Pending   0              3d23h
查看服务状态,发现是cpu资源不足。
[root@vm248 ~]# kubectl describe pods gcdw-1-0 -n gcdw
Name:             gcdw-1-0
Namespace:        gcdw
Priority:         0
Service Account:  gcdw-server
Node:             <none>
Labels:           app=gcdw
                  controller-revision-hash=gcdw-1-5694cf7f5
                  index=1
                  service=coordinator
                  statefulset.kubernetes.io/pod-name=gcdw-1-0
                  tenant=gcdw
Annotations:      <none>
Status:           Pending
IP:
IPs:              <none>
Controlled By:    StatefulSet/gcdw-1
Containers:
  gcdw:
    Image:      172.16.3.249:8443/gcdw/gcdw-server:9.8.0.3.5
    Port:       5258/TCP
    Host Port:  0/TCP
    Command:
      /opt/startup.sh
      -oc gcluster_metadata_server_ip=192.168.1.1 gcluster_instance_name='gcdw' -f RhB67lav:5v0XRDQq@172.16.3.248:4500 -s GCDW_S3_ACCESS_KEY_ID=I3TvJsbgkntEngqb GCDW_S3_SECRET_KEY=iuRveDml43Bk4NdztzRpj64t1Pz67pY0 GCDW_S3_ENDPOINT=http://172.16.3.249:9000 GCDW_S3_REGION=TianJIn GCDW_S3_BUCKET=bucket-248
    Limits:
      cpu:     4
      memory:  16Gi
    Requests:
      cpu:     1
      memory:  1Gi
    Environment:
      MY_POD_NAME:        gcdw-1-0 (v1:metadata.name)
      MY_POD_NAMESPACE:   gcdw (v1:metadata.namespace)
      MY_POD_IP:           (v1:status.podIP)
      MY_POD_TYPE:        coordinator
      MY_POD_IMAGE:       172.16.3.249:8443/gcdw/gcdw-server:9.8.0.3.5
      MY_POD_APIVERSION:  gcdw.gbase.cn/v1alpha1
      MY_METADATA_ADDR:   172.16.3.248:4550
      MY_FOUNDATION_KEY:  RhB67lav:5v0XRDQq@172.16.3.248:4500
      GCWARE_SERVICE:     gcdw-gcware
    Mounts:
      /etc/localtime from tz-config (rw)
      /opt/gcluster/config/cluster_common.cnf from cluster-common (rw,path="cluster_common.cnf")
      /opt/gcluster/config/gbase_8a_gcluster.cnf from config (rw,path="gbase_8a_gcluster.cnf")
      /opt/gcluster/log/gcluster from filebeat-log (rw)
      /var/run/secrets/kubernetes.io/serviceaccount from kube-api-access-848nz (ro)
Conditions:
  Type           Status
  PodScheduled   False
Volumes:
  config:
    Type:      ConfigMap (a volume populated by a ConfigMap)
    Name:      gcdw-coordinator-default-config
    Optional:  false
  cluster-common:
    Type:      ConfigMap (a volume populated by a ConfigMap)
    Name:      cluster-common
    Optional:  false
  tz-config:
    Type:          HostPath (bare host directory volume)
    Path:          /etc/localtime
    HostPathType:
  filebeat-config-coordinator:
    Type:      ConfigMap (a volume populated by a ConfigMap)
    Name:      filebeat-config-coordinator
    Optional:  false
  filebeat-log:
    Type:       EmptyDir (a temporary directory that shares a pod's lifetime)
    Medium:
    SizeLimit:  <unset>
  kube-api-access-848nz:
    Type:                    Projected (a volume that contains injected data from multiple sources)
    TokenExpirationSeconds:  3607
    ConfigMapName:           kube-root-ca.crt
    ConfigMapOptional:       <nil>
    DownwardAPI:             true
QoS Class:                   Burstable
Node-Selectors:              <none>
Tolerations:                 node.kubernetes.io/not-ready:NoExecute op=Exists for 300s
                             node.kubernetes.io/unreachable:NoExecute op=Exists for 300s
Events:
  Type     Reason            Age                   From               Message
  ----     ------            ----                  ----               -------
  Warning  FailedScheduling  3d (x274 over 3d23h)  default-scheduler  0/1 nodes are available: 1 Insufficient cpu. preemption: 0/1 nodes are available: 1 No preemption victims found for incoming pod..
  Warning  FailedScheduling  2m4s (x5 over 22m)    default-scheduler  0/1 nodes are available: 1 Insufficient cpu. preemption: 0/1 nodes are available: 1 No preemption victims found for incoming pod..
[root@vm248 ~]#
kubectl logs 查看服务日志
检查服务状态,比如是否由报错,登录失败等,可以看下POD的日志
- -f参数,可以类似tail 那样,流式持续查看新生成的日志。
- --tail=10 指定显示末尾多少行日志
[root@vm248 ~]# kubectl logs gcdw-saas-backend-0 -n gcdw
 .---. .----.   .--.   .----..----.    .---. .-.    .----. .-. .-..----.    .----.   .--.  .---.  .--.  .----.   .--.   .----..----.
/   __}| {}  } / {} \ { {__  | {_     /  ___}| |   /  {}  \| { } || {}  \   | {}  \ / {} \{_   _}/ {} \ | {}  } / {} \ { {__  | {_
\  {_ }| {}  }/  /\  \.-._} }| {__    \     }| `--.\      /| {_} ||     /   |     //  /\  \ | | /  /\  \| {}  }/  /\  \.-._} }| {__
 `---' `----' `-'  `-'`----' `----'    `---' `----' `----' `-----'`----'    `----' `-'  `-' `-' `-'  `-'`----' `-'  `-'`----' `----'

GBase Cloud Database Version: 1.0.0
Spring Boot Version: 2.3.7.RELEASE

01:56:23.262 [main] INFO  c.g.c.CloudDatabaseMainApplication - [logStarting,55] - Starting CloudDatabaseMainApplication on gcdw-saas-backend-0 with PID 1 (/backend/cloud-database-main.jar started by root in /backend)
01:56:23.267 [main] INFO  c.g.c.CloudDatabaseMainApplication - [logStartupProfileInfo,655] - The following profiles are active: local
01:56:25.093 [main] INFO  o.s.d.r.c.RepositoryConfigurationDelegate - [multipleStoresDetected,249] - Multiple Spring Data modules found, entering strict repository configuration mode!
01:56:25.100 [main] INFO  o.s.d.r.c.RepositoryConfigurationDelegate - [registerRepositoriesIn,127] - Bootstrapping Spring Data Redis repositories in DEFAULT mode.
01:56:25.197 [main] INFO  o.s.d.r.c.RepositoryConfigurationDelegate - [registerRepositoriesIn,187] - Finished Spring Data repository scanning in 70ms. Found 0 Redis repository interfaces.
01:56:26.974 [main] INFO  o.s.b.w.e.t.TomcatWebServer - [initialize,108] - Tomcat initialized with port(s): 8082 (http)
01:56:27.014 [main] INFO  o.a.c.h.Http11NioProtocol - [log,173] - Initializing ProtocolHandler ["http-nio-8082"]
01:56:27.016 [main] INFO  o.a.c.c.StandardService - [log,173] - Starting service [Tomcat]
01:56:27.017 [main] INFO  o.a.c.c.StandardEngine - [log,173] - Starting Servlet engine: [Apache Tomcat/9.0.41]
01:56:27.124 [main] INFO  o.a.c.c.C.[.[.[/api/v1] - [log,173] - Initializing Spring embedded WebApplicationContext
01:56:27.125 [main] INFO  o.s.b.w.s.c.ServletWebServerApplicationContext - [prepareWebApplicationContext,285] - Root WebApplicationContext: initialization completed in 3705 ms
01:56:29.568 [main] INFO  o.s.s.c.ThreadPoolTaskExecutor - [initialize,181] - Initializing ExecutorService 'applicationTaskExecutor'
01:56:30.790 [main] INFO  o.s.s.w.DefaultSecurityFilterChain - [<init>,43] - Creating filter chain: any request, [org.springframework.security.web.context.request.async.WebAsyncManagerIntegrationFilter@39655d3e, org.springframework.security.web.context.SecurityContextPersistenceFilter@5460cf3a, org.springframework.security.web.header.HeaderWriterFilter@4b79ac84, org.springframework.web.filter.CorsFilter@71687585, org.springframework.security.web.authentication.logout.LogoutFilter@22356acd, cn.gbase.cloud.sys.security.filter.JwtAuthenticationTokenFilter@2a8448fa, org.springframework.security.web.savedrequest.RequestCacheAwareFilter@2e6a5539, org.springframework.security.web.servletapi.SecurityContextHolderAwareRequestFilter@27d4a09, org.springframework.security.web.authentication.AnonymousAuthenticationFilter@34f22f9d, org.springframework.security.web.session.SessionManagementFilter@6dab9b6d, org.springframework.security.web.access.ExceptionTranslationFilter@34158c08, org.springframework.security.web.access.intercept.FilterSecurityInterceptor@42039326]
01:56:30.895 [main] INFO  o.a.c.h.Http11NioProtocol - [log,173] - Starting ProtocolHandler ["http-nio-8082"]
01:56:31.189 [main] INFO  o.s.b.w.e.t.TomcatWebServer - [start,220] - Tomcat started on port(s): 8082 (http) with context path '/api/v1'
01:56:31.323 [main] INFO  c.g.c.CloudDatabaseMainApplication - [logStarted,61] - Started CloudDatabaseMainApplication in 9.565 seconds (JVM running for 11.241)
01:59:01.475 [http-nio-8082-exec-1] INFO  o.a.c.c.C.[.[.[/api/v1] - [log,173] - Initializing Spring DispatcherServlet 'dispatcherServlet'
01:59:01.476 [http-nio-8082-exec-1] INFO  o.s.w.s.DispatcherServlet - [initServletBean,525] - Initializing Servlet 'dispatcherServlet'
01:59:01.506 [http-nio-8082-exec-1] INFO  o.s.w.s.DispatcherServlet - [initServletBean,547] - Completed initialization in 29 ms
01:59:01.736 [http-nio-8082-exec-1] INFO  Gbase操作日志 - [info,20] - 进入登录接口
01:59:01.758 [http-nio-8082-exec-1] INFO  Gbase操作日志 - [info,20] - 开始创建连接
ip: ./account --show -A admin |grep coor_addr| awk -F": " '{print $2}'
01:59:01.763 [http-nio-8082-exec-1] INFO  Gbase操作日志 - [info,20] - ip:
system path: /backend
01:59:01.764 [http-nio-8082-exec-1] INFO  Gbase操作日志 - [info,20] - system path:
ip exitValue: 0
01:59:02.195 [http-nio-8082-exec-1] INFO  Gbase操作日志 - [info,20] - ip exitValue:
IP out: null
IP err: null
01:59:02.199 [http-nio-8082-exec-1] INFO  Gbase操作日志 - [info,20] - IP err:
01:59:02.200 [http-nio-8082-exec-1] INFO  Gbase操作日志 - [info,20] - IP out:
01:59:02.203 [http-nio-8082-exec-1] INFO  Gbase操作日志 - [info,20] - create connection ConnectionName:
create connection ConnectionName: admin#admin#14beca88c11340c8adeeee0f267efa28
01:59:02.212 [http-nio-8082-exec-1] ERROR Gbase操作日志 - [error,36] - 登录失败,发生异常
java.lang.NullPointerException: null
        at java.util.Hashtable.put(Hashtable.java:460)
        at java.util.Properties.setProperty(Properties.java:166)
        at cn.gbase.cloud.datasource.connection.general.GeneralConnectionState.connect(GeneralConnectionState.java:100)
        at cn.gbase.cloud.sys.auth.impl.AuthServiceImpl.generateConnection(AuthServiceImpl.java:160)
        at cn.gbase.cloud.sys.auth.impl.AuthServiceImpl.login(AuthServiceImpl.java:112)
        at cn.gbase.cloud.controller.login.SysLoginController.login(SysLoginController.java:42)
logs参数
[root@k8s-81 ~]# kubectl logs -h
Print the logs for a container in a pod or specified resource. If the pod has only one container, the container name is
optional.

Examples:
  # Return snapshot logs from pod nginx with only one container
  kubectl logs nginx

  # Return snapshot logs from pod nginx with multi containers
  kubectl logs nginx --all-containers=true

  # Return snapshot logs from all containers in pods defined by label app=nginx
  kubectl logs -l app=nginx --all-containers=true

  # Return snapshot of previous terminated ruby container logs from pod web-1
  kubectl logs -p -c ruby web-1

  # Begin streaming the logs of the ruby container in pod web-1
  kubectl logs -f -c ruby web-1

  # Begin streaming the logs from all containers in pods defined by label app=nginx
  kubectl logs -f -l app=nginx --all-containers=true

  # Display only the most recent 20 lines of output in pod nginx
  kubectl logs --tail=20 nginx

  # Show all logs from pod nginx written in the last hour
  kubectl logs --since=1h nginx

  # Show logs from a kubelet with an expired serving certificate
  kubectl logs --insecure-skip-tls-verify-backend nginx

  # Return snapshot logs from first container of a job named hello
  kubectl logs job/hello

  # Return snapshot logs from container nginx-1 of a deployment named nginx
  kubectl logs deployment/nginx -c nginx-1

Options:
    --all-containers=false:
        Get all containers' logs in the pod(s).

    -c, --container='':
        Print the logs of this container

    -f, --follow=false:
        Specify if the logs should be streamed.

    --ignore-errors=false:
        If watching / following pod logs, allow for any errors that occur to be non-fatal

    --insecure-skip-tls-verify-backend=false:
        Skip verifying the identity of the kubelet that logs are requested from.  In theory, an attacker could provide
        invalid log content back. You might want to use this if your kubelet serving certificates have expired.

    --limit-bytes=0:
        Maximum bytes of logs to return. Defaults to no limit.

    --max-log-requests=5:
        Specify maximum number of concurrent logs to follow when using by a selector. Defaults to 5.

    --pod-running-timeout=20s:
        The length of time (like 5s, 2m, or 3h, higher than zero) to wait until at least one pod is running

    --prefix=false:
        Prefix each log line with the log source (pod name and container name)

    -p, --previous=false:
        If true, print the logs for the previous instance of the container in a pod if it exists.

    -l, --selector='':
        Selector (label query) to filter on, supports '=', '==', and '!='.(e.g. -l key1=value1,key2=value2). Matching
        objects must satisfy all of the specified label constraints.

    --since=0s:
        Only return logs newer than a relative duration like 5s, 2m, or 3h. Defaults to all logs. Only one of
        since-time / since may be used.

    --since-time='':
        Only return logs after a specific date (RFC3339). Defaults to all logs. Only one of since-time / since may be
        used.

    --tail=-1:
        Lines of recent log file to display. Defaults to -1 with no selector, showing all log lines otherwise 10, if a
        selector is provided.

    --timestamps=false:
        Include timestamps on each line in the log output

Usage:
  kubectl logs [-f] [-p] (POD | TYPE/NAME) [-c CONTAINER] [options]

Use "kubectl options" for a list of global command-line options (applies to all commands).
[root@k8s-81 ~]#
kubectl exec 登录POD
其中 gcdw-saas-backend-0是POD的名字。 -n 是namespace的名字 -- 后面是执行的命令(Command)
[root@k8s-81 ~]# kubectl exec -ti gcdw-saas-backend-0  -n gcdw -- /bin/bash
[root@gcdw-saas-backend-0 backend]# pwd
/backend
[root@gcdw-saas-backend-0 backend]# ls -l
total 166936
-rwxrwxrwx. 1 root root 136414064 1月   6 17:47 account
-rw-r--r--. 1 root root  34523121 1月   6 19:02 cloud-database-main.jar
drwxrwxrwx. 3 root root        83 5月  30 17:12 config
drwxr-xr-x. 2 root root        81 5月  30 17:14 log
[root@gcdw-saas-backend-0 backend]# cd log/
[root@gcdw-saas-backend-0 log]# ll
total 12
-rw-r--r--. 1 root root 1177 5月  30 17:22 gbase-cloud-database-error.log
-rw-r--r--. 1 root root 6034 5月  30 17:23 gbase-cloud-database-info.log
查看节点信息,CPU等
[root@vm248 net.d]# kubectl describe nodes vm248
Name:               vm248
Roles:              control-plane
Labels:             beta.kubernetes.io/arch=amd64
                    beta.kubernetes.io/os=linux
                    kubernetes.io/arch=amd64
                    kubernetes.io/hostname=vm248
                    kubernetes.io/os=linux
                    node-role.kubernetes.io/control-plane=
                    node.kubernetes.io/exclude-from-external-load-balancers=
Annotations:        flannel.alpha.coreos.com/backend-data: {"VNI":1,"VtepMAC":"ea:a4:42:48:d0:08"}
                    flannel.alpha.coreos.com/backend-type: vxlan
                    flannel.alpha.coreos.com/kube-subnet-manager: true
                    flannel.alpha.coreos.com/public-ip: 172.16.3.248
                    kubeadm.alpha.kubernetes.io/cri-socket: unix:///var/run/containerd/containerd.sock
                    node.alpha.kubernetes.io/ttl: 0
                    volumes.kubernetes.io/controller-managed-attach-detach: true
CreationTimestamp:  Tue, 27 Jun 2023 00:57:49 -0700
Taints:             <none>
Unschedulable:      false
Lease:
  HolderIdentity:  vm248
  AcquireTime:     <unset>
  RenewTime:       Thu, 29 Jun 2023 00:15:56 -0700
Conditions:
  Type                 Status  LastHeartbeatTime                 LastTransitionTime                Reason                       Message
  ----                 ------  -----------------                 ------------------                ------                       -------
  NetworkUnavailable   False   Thu, 29 Jun 2023 00:00:42 -0700   Thu, 29 Jun 2023 00:00:42 -0700   FlannelIsUp                  Flannel is running on this node
  MemoryPressure       False   Thu, 29 Jun 2023 00:15:27 -0700   Tue, 27 Jun 2023 00:57:46 -0700   KubeletHasSufficientMemory   kubelet has sufficient memory available
  DiskPressure         False   Thu, 29 Jun 2023 00:15:27 -0700   Tue, 27 Jun 2023 00:57:46 -0700   KubeletHasNoDiskPressure     kubelet has no disk pressure
  PIDPressure          False   Thu, 29 Jun 2023 00:15:27 -0700   Tue, 27 Jun 2023 00:57:46 -0700   KubeletHasSufficientPID      kubelet has sufficient PID available
  Ready                True    Thu, 29 Jun 2023 00:15:27 -0700   Wed, 28 Jun 2023 23:19:06 -0700   KubeletReady                 kubelet is posting ready status
Addresses:
  InternalIP:  172.16.3.248
  Hostname:    vm248
Capacity:
  cpu:                8
  ephemeral-storage:  515469400Ki
  hugepages-2Mi:      0
  memory:             16247552Ki
  pods:               110
Allocatable:
  cpu:                8
  ephemeral-storage:  475056598254
  hugepages-2Mi:      0
  memory:             16145152Ki
  pods:               110
System Info:
  Machine ID:                 e299434d2c77427cbaffeef622fd23a3
  System UUID:                564DC80C-1064-7CE0-D1EA-234F39AA3E6A
  Boot ID:                    b01e6c48-6b52-4e1b-9de1-479c3bd4eaa1
  Kernel Version:             3.10.0-1160.el7.x86_64
  OS Image:                   CentOS Linux 7 (Core)
  Operating System:           linux
  Architecture:               amd64
  Container Runtime Version:  containerd://1.6.21
  Kubelet Version:            v1.27.3
  Kube-Proxy Version:         v1.27.3
PodCIDR:                      10.244.0.0/24
PodCIDRs:                     10.244.0.0/24
Non-terminated Pods:          (17 in total)
  Namespace                   Name                              CPU Requests  CPU Limits  Memory Requests  Memory Limits  Age
  ---------                   ----                              ------------  ----------  ---------------  -------------  ---
  gcdw                        gcdw-ftp-0                        0 (0%)        0 (0%)      0 (0%)           0 (0%)         3h52m
  gcdw                        gcdw-operator-58b76d54fc-tgcdp    1 (12%)       2 (25%)     1Gi (6%)         2Gi (12%)      3h52m
  gcdw                        gcdw-redis-0                      0 (0%)        0 (0%)      0 (0%)           0 (0%)         3h52m
  gcdw                        gcdw-saas-backend-0               0 (0%)        0 (0%)      0 (0%)           0 (0%)         3h52m
  gcdw                        gcdw-saas-frontend-0              0 (0%)        0 (0%)      0 (0%)           0 (0%)         3h52m
  kube-flannel                kube-flannel-ds-6zzf8             100m (1%)     0 (0%)      50Mi (0%)        0 (0%)         15m
  kube-system                 coredns-7bdc4cb885-hftgj          100m (1%)     0 (0%)      70Mi (0%)        170Mi (1%)     47h
  kube-system                 coredns-7bdc4cb885-xs2vh          100m (1%)     0 (0%)      70Mi (0%)        170Mi (1%)     47h
  kube-system                 etcd-vm248                        100m (1%)     0 (0%)      100Mi (0%)       0 (0%)         47h
  kube-system                 kube-apiserver-vm248              250m (3%)     0 (0%)      0 (0%)           0 (0%)         47h
  kube-system                 kube-controller-manager-vm248     200m (2%)     0 (0%)      0 (0%)           0 (0%)         4h28m
  kube-system                 kube-proxy-4k7n4                  0 (0%)        0 (0%)      0 (0%)           0 (0%)         47h
  kube-system                 kube-scheduler-vm248              100m (1%)     0 (0%)      0 (0%)           0 (0%)         47h
  zxq                         coordinator-1-0                   1 (12%)       4 (50%)     1Gi (6%)         16Gi (103%)    14m
  zxq                         gcware-0                          1 (12%)       4 (50%)     1Gi (6%)         4Gi (25%)      14m
  zxq                         small-c1-0                        1 (12%)       16 (200%)   1Gi (6%)         32Gi (207%)    10m
  zxq                         small-c1-1                        1 (12%)       16 (200%)   1Gi (6%)         32Gi (207%)    10m
Allocated resources:
  (Total limits may be over 100 percent, i.e., overcommitted.)
  Resource           Requests      Limits
  --------           --------      ------
  cpu                5950m (74%)   42 (525%)
  memory             5410Mi (34%)  88404Mi (560%)
  ephemeral-storage  0 (0%)        0 (0%)
  hugepages-2Mi      0 (0%)        0 (0%)
Events:
  Type     Reason                   Age                From             Message
  ----     ------                   ----               ----             -------
  Normal   Starting                 15m                kube-proxy
  Normal   Starting                 52m                kube-proxy
  Normal   Starting                 41m                kube-proxy
  Normal   Starting                 33m                kube-proxy
  Normal   RegisteredNode           111m               node-controller  Node vm248 event: Registered Node vm248 in Controller
  Normal   RegisteredNode           102m               node-controller  Node vm248 event: Registered Node vm248 in Controller
  Normal   RegisteredNode           98m                node-controller  Node vm248 event: Registered Node vm248 in Controller
  Normal   RegisteredNode           88m                node-controller  Node vm248 event: Registered Node vm248 in Controller
  Normal   RegisteredNode           84m                node-controller  Node vm248 event: Registered Node vm248 in Controller
  Normal   RegisteredNode           75m                node-controller  Node vm248 event: Registered Node vm248 in Controller
  Normal   RegisteredNode           71m                node-controller  Node vm248 event: Registered Node vm248 in Controller
  Normal   RegisteredNode           62m                node-controller  Node vm248 event: Registered Node vm248 in Controller
  Normal   RegisteredNode           58m                node-controller  Node vm248 event: Registered Node vm248 in Controller
  Normal   Starting                 57m                kubelet          Starting kubelet.
  Warning  InvalidDiskCapacity      57m                kubelet          invalid capacity 0 on image filesystem
  Normal   NodeHasSufficientMemory  57m                kubelet          Node vm248 status is now: NodeHasSufficientMemory
  Normal   NodeAllocatableEnforced  57m                kubelet          Updated Node Allocatable limit across pods
  Normal   NodeNotReady             57m                kubelet          Node vm248 status is now: NodeNotReady
  Normal   NodeHasSufficientPID     57m                kubelet          Node vm248 status is now: NodeHasSufficientPID
  Normal   NodeHasNoDiskPressure    57m                kubelet          Node vm248 status is now: NodeHasNoDiskPressure
  Normal   NodeReady                56m                kubelet          Node vm248 status is now: NodeReady
  Warning  InvalidDiskCapacity      52m                kubelet          invalid capacity 0 on image filesystem
  Normal   Starting                 52m                kubelet          Starting kubelet.
  Normal   NodeHasNoDiskPressure    52m (x7 over 52m)  kubelet          Node vm248 status is now: NodeHasNoDiskPressure
  Normal   NodeHasSufficientPID     52m (x7 over 52m)  kubelet          Node vm248 status is now: NodeHasSufficientPID
  Normal   NodeAllocatableEnforced  52m                kubelet          Updated Node Allocatable limit across pods
  Normal   NodeHasSufficientMemory  52m (x8 over 52m)  kubelet          Node vm248 status is now: NodeHasSufficientMemory
  Normal   RegisteredNode           51m                node-controller  Node vm248 event: Registered Node vm248 in Controller
  Normal   RegisteredNode           47m                node-controller  Node vm248 event: Registered Node vm248 in Controller
  Normal   Starting                 42m                kubelet          Starting kubelet.
  Warning  InvalidDiskCapacity      42m                kubelet          invalid capacity 0 on image filesystem
  Normal   NodeAllocatableEnforced  42m                kubelet          Updated Node Allocatable limit across pods
  Normal   NodeHasSufficientMemory  42m (x8 over 42m)  kubelet          Node vm248 status is now: NodeHasSufficientMemory
  Normal   NodeHasSufficientPID     42m (x7 over 42m)  kubelet          Node vm248 status is now: NodeHasSufficientPID
  Normal   NodeHasNoDiskPressure    42m (x7 over 42m)  kubelet          Node vm248 status is now: NodeHasNoDiskPressure
  Normal   RegisteredNode           41m                node-controller  Node vm248 event: Registered Node vm248 in Controller
  Normal   RegisteredNode           37m                node-controller  Node vm248 event: Registered Node vm248 in Controller
  Warning  InvalidDiskCapacity      33m                kubelet          invalid capacity 0 on image filesystem
  Normal   Starting                 33m                kubelet          Starting kubelet.
  Normal   NodeAllocatableEnforced  33m                kubelet          Updated Node Allocatable limit across pods
  Normal   NodeHasSufficientPID     33m (x7 over 33m)  kubelet          Node vm248 status is now: NodeHasSufficientPID
  Normal   NodeHasNoDiskPressure    33m (x7 over 33m)  kubelet          Node vm248 status is now: NodeHasNoDiskPressure
  Normal   NodeHasSufficientMemory  33m (x8 over 33m)  kubelet          Node vm248 status is now: NodeHasSufficientMemory
  Normal   RegisteredNode           32m                node-controller  Node vm248 event: Registered Node vm248 in Controller
  Normal   RegisteredNode           28m                node-controller  Node vm248 event: Registered Node vm248 in Controller
  Normal   RegisteredNode           24m                node-controller  Node vm248 event: Registered Node vm248 in Controller
  Normal   RegisteredNode           20m                node-controller  Node vm248 event: Registered Node vm248 in Controller
  Normal   Starting                 15m                kubelet          Starting kubelet.
  Warning  InvalidDiskCapacity      15m                kubelet          invalid capacity 0 on image filesystem
  Normal   NodeHasNoDiskPressure    15m (x7 over 15m)  kubelet          Node vm248 status is now: NodeHasNoDiskPressure
  Normal   NodeHasSufficientMemory  15m (x8 over 15m)  kubelet          Node vm248 status is now: NodeHasSufficientMemory
  Normal   NodeHasSufficientPID     15m (x7 over 15m)  kubelet          Node vm248 status is now: NodeHasSufficientPID
  Normal   NodeAllocatableEnforced  15m                kubelet          Updated Node Allocatable limit across pods
  Normal   RegisteredNode           15m                node-controller  Node vm248 event: Registered Node vm248 in Controller
  Normal   RegisteredNode           11m                node-controller  Node vm248 event: Registered Node vm248 in Controller
  Normal   RegisteredNode           7m25s              node-controller  Node vm248 event: Registered Node vm248 in Controller
  Normal   RegisteredNode           3m22s              node-controller  Node vm248 event: Registered Node vm248 in Controller
[root@vm248 net.d]#
删除清理kubectl环境
kubeadm reset -f
modprobe -r ipip
lsmod
rm -rf ~/.kube/
rm -rf /etc/kubernetes/
rm -rf /etc/systemd/system/kubelet.service.d
rm -rf /etc/systemd/system/kubelet.service
rm -rf /usr/bin/kube*
rm -rf /etc/cni
rm -rf /opt/cni
rm -rf /var/lib/etcd
yum remove -y kubelet kubeadm kubectl