GBase 8a数据库集群,支持从现有集群扩容操作,可以同时扩容多个数据节点和管理节点。扩容一般是因为空间占用或者性能问题导致。GBase 通过重分布功能将数据重新分散到所有的数据节点上,以实现数据空间的再平衡。本文是一个详细操作步骤和手顺。
扩容和缩容是2个完全相反的结果,但大体操作步骤基本类似,只是相反的。缩容步骤请参考。 GBase 8a 缩容操作步骤实例
目录导航
目标
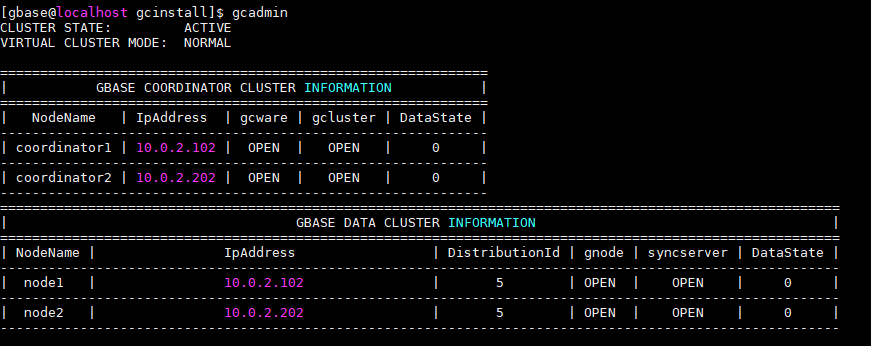
本文的目标,是将一个2节点的集群,扩容到3个节点,也就是增加1个管理和数据符合节点。现状如下:
V95版本的一些注意事项,请参考 GBase 8a集群V95新安装注意事项
编辑扩容操作配置文件
安转包的解压步骤就不介绍了,我们直接转到安装包的gcinstall目录下,编写demo.options。 按照实际情况填写用户信息。
注意本文用的是V95版本,其格式和V8的不同,请参考安装手册的相关介绍。但其中重要的部分是一致的。其中
installPrefix 是集群安装目录,请一定和原有节点的保持一致。
coordinatorHost 是要扩容的节点IP,多个时用逗号分割
coordinateHostNodeID 这个只有IPV6时才有用,ipv4写不写都行,被内部忽略
dataHost 本次扩容的数据节点IP
existCoordinateHost 已经存在的管理节点IP, 多个用逗号分割
existDataHost 已经存在的数据节点IP,多个用逗号分割
dbaUser 操作系统的dba用户名,在v95里面是有用户自行创建的
dbaGroup 操作系统的dba用户名所属用户组
dbaPwd 操作系统的dba用户密码
rootPwd操作系统root用户密码,在V95里不需要。
genDBPwd 这个是V95的名字,代表数据库用户root的密码。请区分数据库用户和操作系统用户的区别。
[gbase@localhost gcinstall]$ cat demo.options
installPrefix= /opt/gbase
coordinateHost = 10.0.2.203
coordinateHostNodeID = 203
dataHost = 10.0.2.203
existCoordinateHost =10.0.2.102,10.0.2.202
existDataHost =10.0.2.102,10.0.2.202
dbaUser = gbase
dbaGroup = gbase
dbaPwd = 'gbase1234'
rootPwd = '111111'
#rootPwdFile = rootPwd.json
genDBPwd=''
如下是一个V8版本的demo.options的样子。其中loginUser请尽量用root用户。dbRootPwd是数据库root用户的密码。
[root@localhost gcinstall]# cat demo.options
installPrefix= /opt
coordinateHost = 10.0.2.106
coordinateHostNodeID = 106
dataHost = 10.0.2.106
#existCoordinateHost =
#existDataHost =
loginUser= root
loginUserPwd = '111111'
#loginUserPwdFile = loginUserPwd.json
dbaUser = gbase
dbaGroup = gbase
dbaPwd = 'gbase1234'
rootPwd = '111111'
#rootPwdFile = rootPwd.json
dbRootPwd = ''
#mcastAddr = 226.94.1.39
mcastPort = 5493
[root@localhost gcinstall]#
停止数据库服务
如果扩容服务有管理节点,需要停下所有节点的数据库服务。如果只扩容数据节点,则可以跳过本步骤。
如果不停服务,而扩容管理节点,扩容安装步骤会报这个错误 must stop all gcluster nodes before extend gcluster. you can search 'still running' in gcinstall.log to find them.
停服务的方法,请自行在每个节点操作即可。本文用的是ssh远程操作的。
[gbase@localhost gcinstall]$ ssh 10.0.2.102 "gcluster_services all stop"
The authenticity of host '10.0.2.102 (10.0.2.102)' can't be established.
ECDSA key fingerprint is d1:17:f6:1e:3b:97:e4:db:37:d5:9b:cb:00:14:66:b6.
Are you sure you want to continue connecting (yes/no)? yes
Warning: Permanently added '10.0.2.102' (ECDSA) to the list of known hosts.
gbase
gbase@10.0.2.102's password:
Stopping GCMonit success!
Stopping gcrecover :                                       [  OK  ]
Stopping gcluster :                                        [  OK  ]
Stopping gcware :                                          [  OK  ]
Stopping gbase :                                           [  OK  ]
Stopping syncserver :                                      [  OK  ]
[gbase@localhost gcinstall]$ ssh 10.0.2.202 "gcluster_services all stop"
gbase@10.0.2.202's password:
Stopping GCMonit success!
Stopping gcrecover :                                       [  OK  ]
Stopping gcluster :                                        [  OK  ]
Stopping gcware :                                          [  OK  ]
Stopping gbase :                                           [  OK  ]
Stopping syncserver :                                      [  OK  ]
[gbase@localhost gcinstall]$
开始安装服务
调用gcinstall.py 用前面编写好的demo.options 开始安装。
请注意,如果扩容了管理节点,则需要将现有管理节点的【元数据】全部复制一份到新的管理节点上,其耗时取决于你的表数量,磁盘和网络的性能。其耗时可能在几分钟到几个小时不等。
[gbase@localhost gcinstall]$ ./gcinstall.py --silent=demo.options
*********************************************************************************
Thank you for choosing GBase product!
此处省略许可信息输出...
*********************************************************************************
Do you accept the above licence agreement ([Y,y]/[N,n])? y
*********************************************************************************
Welcome to install GBase products
*********************************************************************************
Environmental Checking on gcluster nodes.
CoordinateHost:
10.0.2.203
DataHost:
10.0.2.203
Are you sure to install GCluster on these nodes ([Y,y]/[N,n])? y
10.0.2.203 start install on host 10.0.2.203
10.0.2.202 start install on host 10.0.2.202
10.0.2.102 start install on host 10.0.2.102
此处省略n多中间日志输出
10.0.2.203 install cluster on host 10.0.2.203 successfully.
10.0.2.202 install cluster on host 10.0.2.202 successfully.
10.0.2.102 install cluster on host 10.0.2.102 successfully.
update and sync configuration file...
Starting all gcluster nodes...
sync coordinator system tables...
adding new datanodes to gcware...
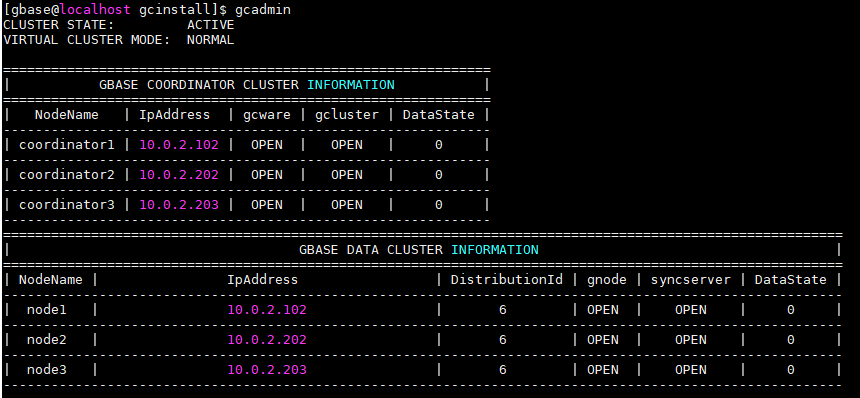
[gbase@localhost gcinstall]$查看当前状态
新的管理节点已经正常提供服务,数据节点还没有参与。
[gbase@localhost gcinstall]$ gcadmin
CLUSTER STATE:         ACTIVE
VIRTUAL CLUSTER MODE:  NORMAL

=============================================================
|           GBASE COORDINATOR CLUSTER INFORMATION           |
=============================================================
|   NodeName   | IpAddress  | gcware | gcluster | DataState |
-------------------------------------------------------------
| coordinator1 | 10.0.2.102 |  OPEN  |   OPEN   |     0     |
-------------------------------------------------------------
| coordinator2 | 10.0.2.202 |  OPEN  |   OPEN   |     0     |
-------------------------------------------------------------
| coordinator3 | 10.0.2.203 |  OPEN  |   OPEN   |     0     |
-------------------------------------------------------------
=========================================================================================================
|                                    GBASE DATA CLUSTER INFORMATION                                     |
=========================================================================================================
| NodeName |                IpAddress                 | DistributionId | gnode | syncserver | DataState |
---------------------------------------------------------------------------------------------------------
|  node1   |                10.0.2.102                |       5        | OPEN  |    OPEN    |     0     |
---------------------------------------------------------------------------------------------------------
|  node2   |                10.0.2.202                |       5        | OPEN  |    OPEN    |     0     |
---------------------------------------------------------------------------------------------------------
|  node3   |                10.0.2.203                |                | OPEN  |    OPEN    |     0     |
---------------------------------------------------------------------------------------------------------
编辑新的分布策略的配置文件
请注意其中的IP顺序,尽量和以前的顺序相同,把新增加的数据节点IP放到最后面。
[gbase@localhost gcinstall]$ cat gcChangeInfo.xml
<?xml version="1.0" encoding="utf-8"?>
<servers>
 <rack>
  <node ip="10.0.2.102"/>
  <node ip="10.0.2.202"/>
  <node ip="10.0.2.203"/>
 </rack>
</servers>
[gbase@localhost gcinstall]$
增加新的分布策略
本步骤要同步一些数据节点的元数据过来,所以会有些许耗时。
查看集群状态,已经看到新增加了distribution Id 为6的新策略,老的ID是5。这个ID后面会用到。
[gbase@localhost gcinstall]$ gcadmin distribution gcChangeInfo.xml p 1 d 1
gcadmin generate distribution ...

NOTE: node [10.0.2.203] is coordinator node, it shall be data node too
copy system table to 10.0.2.203
gcadmin generate distribution successful

[gbase@localhost gcinstall]$ gcadmin
CLUSTER STATE:         ACTIVE
VIRTUAL CLUSTER MODE:  NORMAL

=============================================================
|           GBASE COORDINATOR CLUSTER INFORMATION           |
=============================================================
|   NodeName   | IpAddress  | gcware | gcluster | DataState |
-------------------------------------------------------------
| coordinator1 | 10.0.2.102 |  OPEN  |   OPEN   |     0     |
-------------------------------------------------------------
| coordinator2 | 10.0.2.202 |  OPEN  |   OPEN   |     0     |
-------------------------------------------------------------
| coordinator3 | 10.0.2.203 |  OPEN  |   OPEN   |     0     |
-------------------------------------------------------------
=========================================================================================================
|                                    GBASE DATA CLUSTER INFORMATION                                     |
=========================================================================================================
| NodeName |                IpAddress                 | DistributionId | gnode | syncserver | DataState |
---------------------------------------------------------------------------------------------------------
|  node1   |                10.0.2.102                |      5,6       | OPEN  |    OPEN    |     0     |
---------------------------------------------------------------------------------------------------------
|  node2   |                10.0.2.202                |      5,6       | OPEN  |    OPEN    |     0     |
---------------------------------------------------------------------------------------------------------
|  node3   |                10.0.2.203                |       6        | OPEN  |    OPEN    |     0     |
---------------------------------------------------------------------------------------------------------

[gbase@localhost gcinstall]$ gcadmin showdistribution

                                 Distribution ID: 6 | State: new | Total segment num: 3

             Primary Segment Node IP                   Segment ID                 Duplicate Segment node IP
========================================================================================================================
|                   10.0.2.102                   |         1          |                   10.0.2.202                   |
------------------------------------------------------------------------------------------------------------------------
|                   10.0.2.202                   |         2          |                   10.0.2.203                   |
------------------------------------------------------------------------------------------------------------------------
|                   10.0.2.203                   |         3          |                   10.0.2.102                   |
========================================================================================================================

                                 Distribution ID: 5 | State: old | Total segment num: 2

             Primary Segment Node IP                   Segment ID                 Duplicate Segment node IP
========================================================================================================================
|                   10.0.2.102                   |         1          |                   10.0.2.202                   |
------------------------------------------------------------------------------------------------------------------------
|                   10.0.2.202                   |         2          |                   10.0.2.102                   |
========================================================================================================================
[gbase@localhost gcinstall]$
初始化nodedatamap
[gbase@localhost gcinstall]$ gccli

GBase client 9.5.2.17.115980. Copyright (c) 2004-2020, GBase.  All Rights Reserved.

gbase> initnodedatamap;
Query OK, 0 rows affected, 5 warnings (Elapsed: 00:00:01.36)

gbase>
重分布
本步骤会将数据重新打散到所有节点。实际耗时可能在几分钟,几个小时,几天。根据需要重分布的数据量和硬件性能有关。
完整的流程是
1、关闭重分布并行度,设置为0
2、运行rebalacne instance 或者其他的重分布语句
3、调整优先级。
4、设置合适的并行度参数
5、监控重分布过程
并行度参数设置
请参考 GBase 8a扩容并行任务参数gcluster_rebalancing_concurrent_count
set global gcluster_rebalancing_concurrent_count = 0;如上设置为0,是关闭了并行度,不会在启动任何新任务了,目的是为了后面调整优先级。该参数随时可以设置。如果系统资源空间,可以提高并行度。
重分布操作
请根据需要,支持实例instance, database和table多个级别的。
gbase> rebalance instance;
Query OK, 21 rows affected (Elapsed: 00:00:00.87)
优先级设置
可以通过update标准SQL,设置重分布任务的优先级。用like可以批量设置,用等于可以精确设置。
语法如下:
update gclusterdb.rebalancing_status set priority = 2 where index_name like '{index_name}';其中priority值越小,则优先级越高。
设置完成后,记得查看下是否正确
select index_name,status,priority from gclusterdb.rebalancing_status where priority = 2;如果前面关闭了并行度,则在确认优先级设置成功了,要记得设置并行度。
set global gcluster_rebalancing_concurrent_count = 5;随机分布表的处理
注意:数据库提供了一个参数 gcluster_rebalancing_random_table_quick_mode ,对于随机分布表,将不再参与数据重新平衡。 如果你是为了磁盘空间而扩容,请一定关闭这个参数。
gbase> show variables like '%quick%';
+----------------------------------------------+-------+
| Variable_name                                | Value |
+----------------------------------------------+-------+
| gcluster_rebalancing_random_table_quick_mode | 1     |
+----------------------------------------------+-------+
1 row in set (Elapsed: 00:00:00.00)

gbase> set global gcluster_rebalancing_random_table_quick_mode=0;
Query OK, 0 rows affected (Elapsed: 00:00:00.01)

gbase> show variables like '%quick%';
+----------------------------------------------+-------+
| Variable_name                                | Value |
+----------------------------------------------+-------+
| gcluster_rebalancing_random_table_quick_mode | 0     |
+----------------------------------------------+-------+
1 row in set (Elapsed: 00:00:00.01)
重分布进度查看
重分布期间,可以通过gclusterdb.rebalancing_status表查看进度,一致到所有的都是COMPLETED的为止。
gbase> select status,count(*) from gclusterdb.rebalancing_status group by status;
+-----------+----------+
| status    | count(*) |
+-----------+----------+
| STARTING  |       15 |
| RUNNING   |        3 |
| COMPLETED |        3 |
+-----------+----------+
3 rows in set (Elapsed: 00:00:00.61)


gbase> select status,count(*) from gclusterdb.rebalancing_status group by status;
+-----------+----------+
| status    | count(*) |
+-----------+----------+
| COMPLETED |       21 |
+-----------+----------+
1 row in set (Elapsed: 00:00:00.19)
检查是否有残留
检查gbase.table_distribution表,看是否有老的ID为5的表残留。如果有,则手工执行一个rebalance table 库名.表名 ,并等重分布完成。
gbase> select count(*) from gbase.table_distribution where data_distribution_id=5;
+----------+
| count(*) |
+----------+
|        0 |
+----------+
1 row in set (Elapsed: 00:00:00.00)
删除老的nodedatamap
gbase> refreshnodedatamap drop 5;
Query OK, 0 rows affected, 6 warnings (Elapsed: 00:00:01.80)

gbase>
删掉老的分布策略
[gbase@localhost gcinstall]$ gcadmin rmdistribution 5
cluster distribution ID [5]
it will be removed now
please ensure this is ok, input [Y,y] or [N,n]: y
gcadmin remove distribution [5] success
[gbase@localhost gcinstall]$ gcadmin showdistribution

                                 Distribution ID: 6 | State: new | Total segment num: 3

             Primary Segment Node IP                   Segment ID                 Duplicate Segment node IP
========================================================================================================================
|                   10.0.2.102                   |         1          |                   10.0.2.202                   |
------------------------------------------------------------------------------------------------------------------------
|                   10.0.2.202                   |         2          |                   10.0.2.203                   |
------------------------------------------------------------------------------------------------------------------------
|                   10.0.2.203                   |         3          |                   10.0.2.102                   |
========================================================================================================================
[gbase@localhost gcinstall]$
最终结果
已经成功的从2节点集群,扩容到3节点集群。
总结
整个步骤,核心就是
1、安装新的节点服务
2、增加新的分布策略,以利用新的数据节点
3、重分布数据
4、删掉老的信息
意外处理
扩容期间如在某些步骤时出现意外,比如报错,宕机,断电,网络断开等,请参考
《GBase 8a 扩容操作详细实例》有2条评论
评论已关闭。